HusebyConnect - Common Questions for Remote Events:
"How do I upload my exhibits pre-deposition?"

1. Once the event is created, you're ready to upload
in your private workspace.
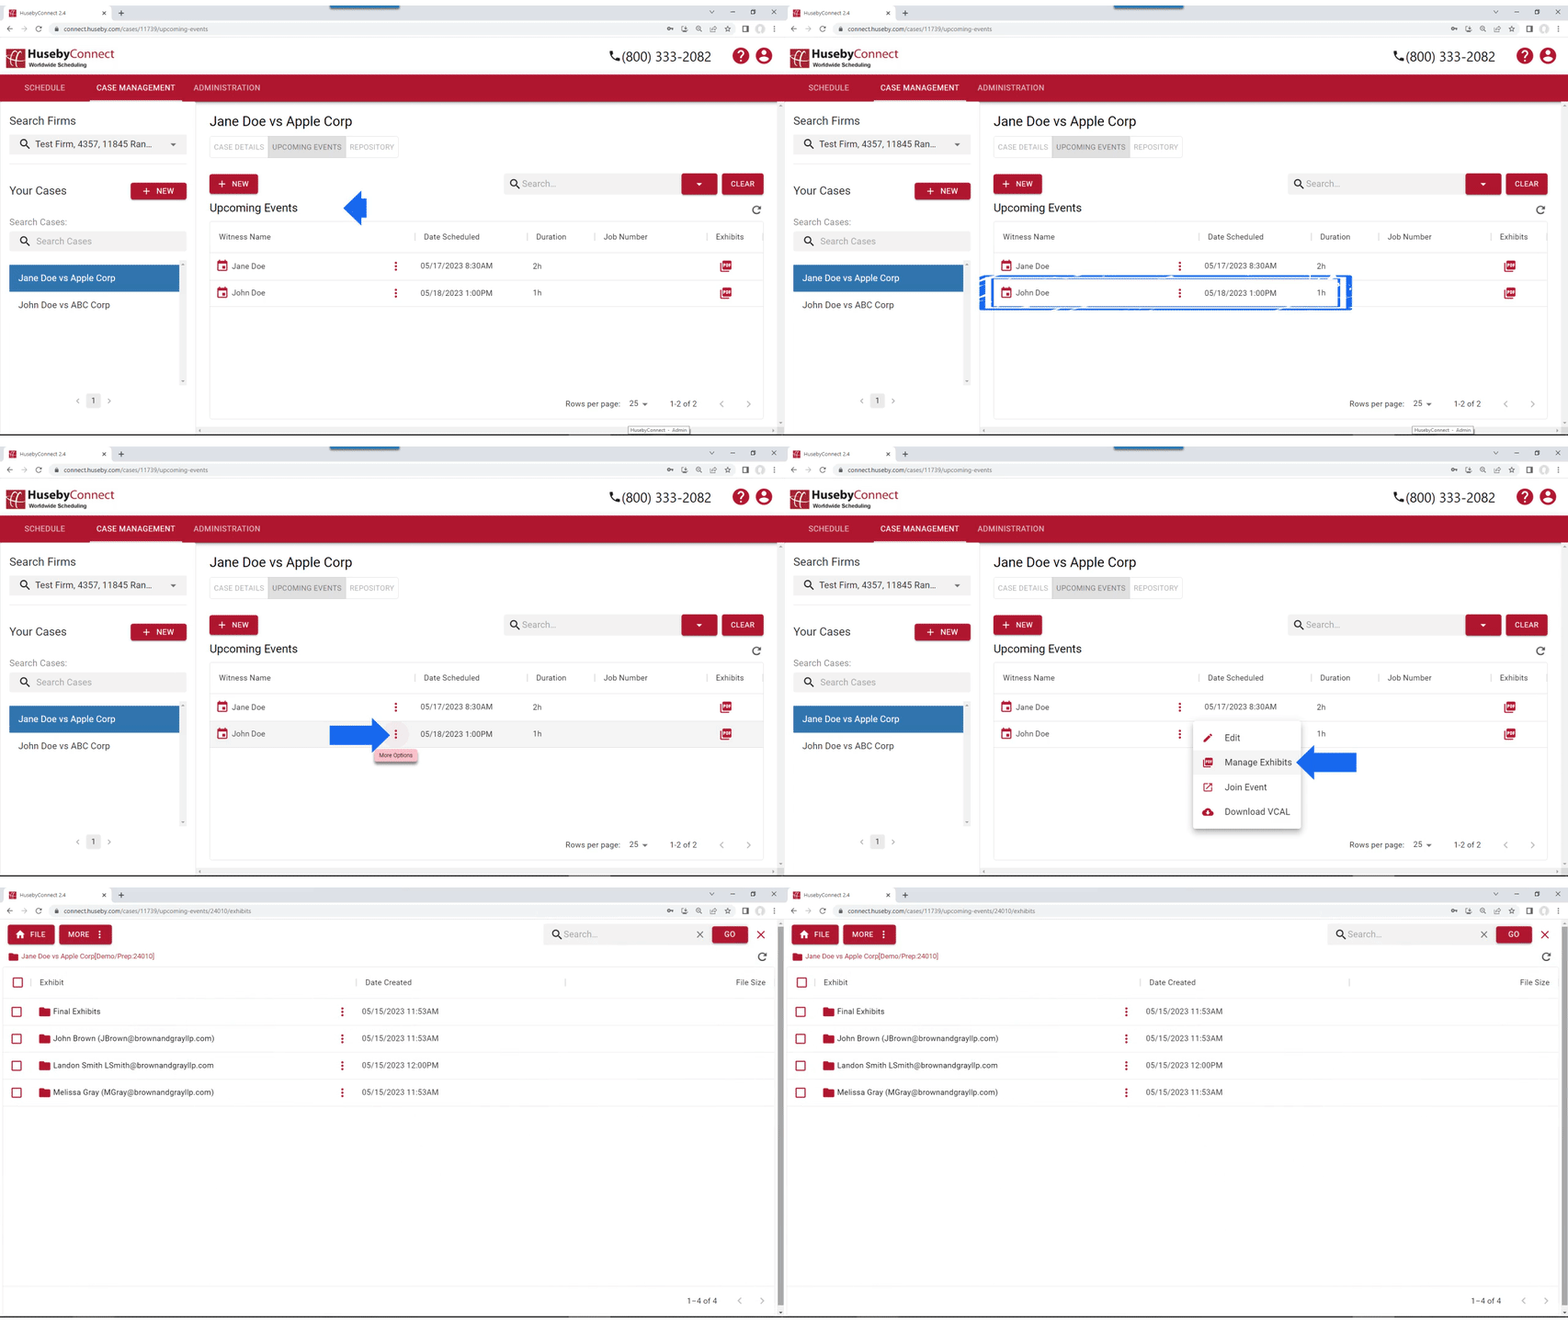
- Log in to your HusebyConnect portal
- Go to your Upcoming Events
- Click the three dots on a specific event for 'More Options' and choose Manage Exhibits
- Your are now in your Private Workspace

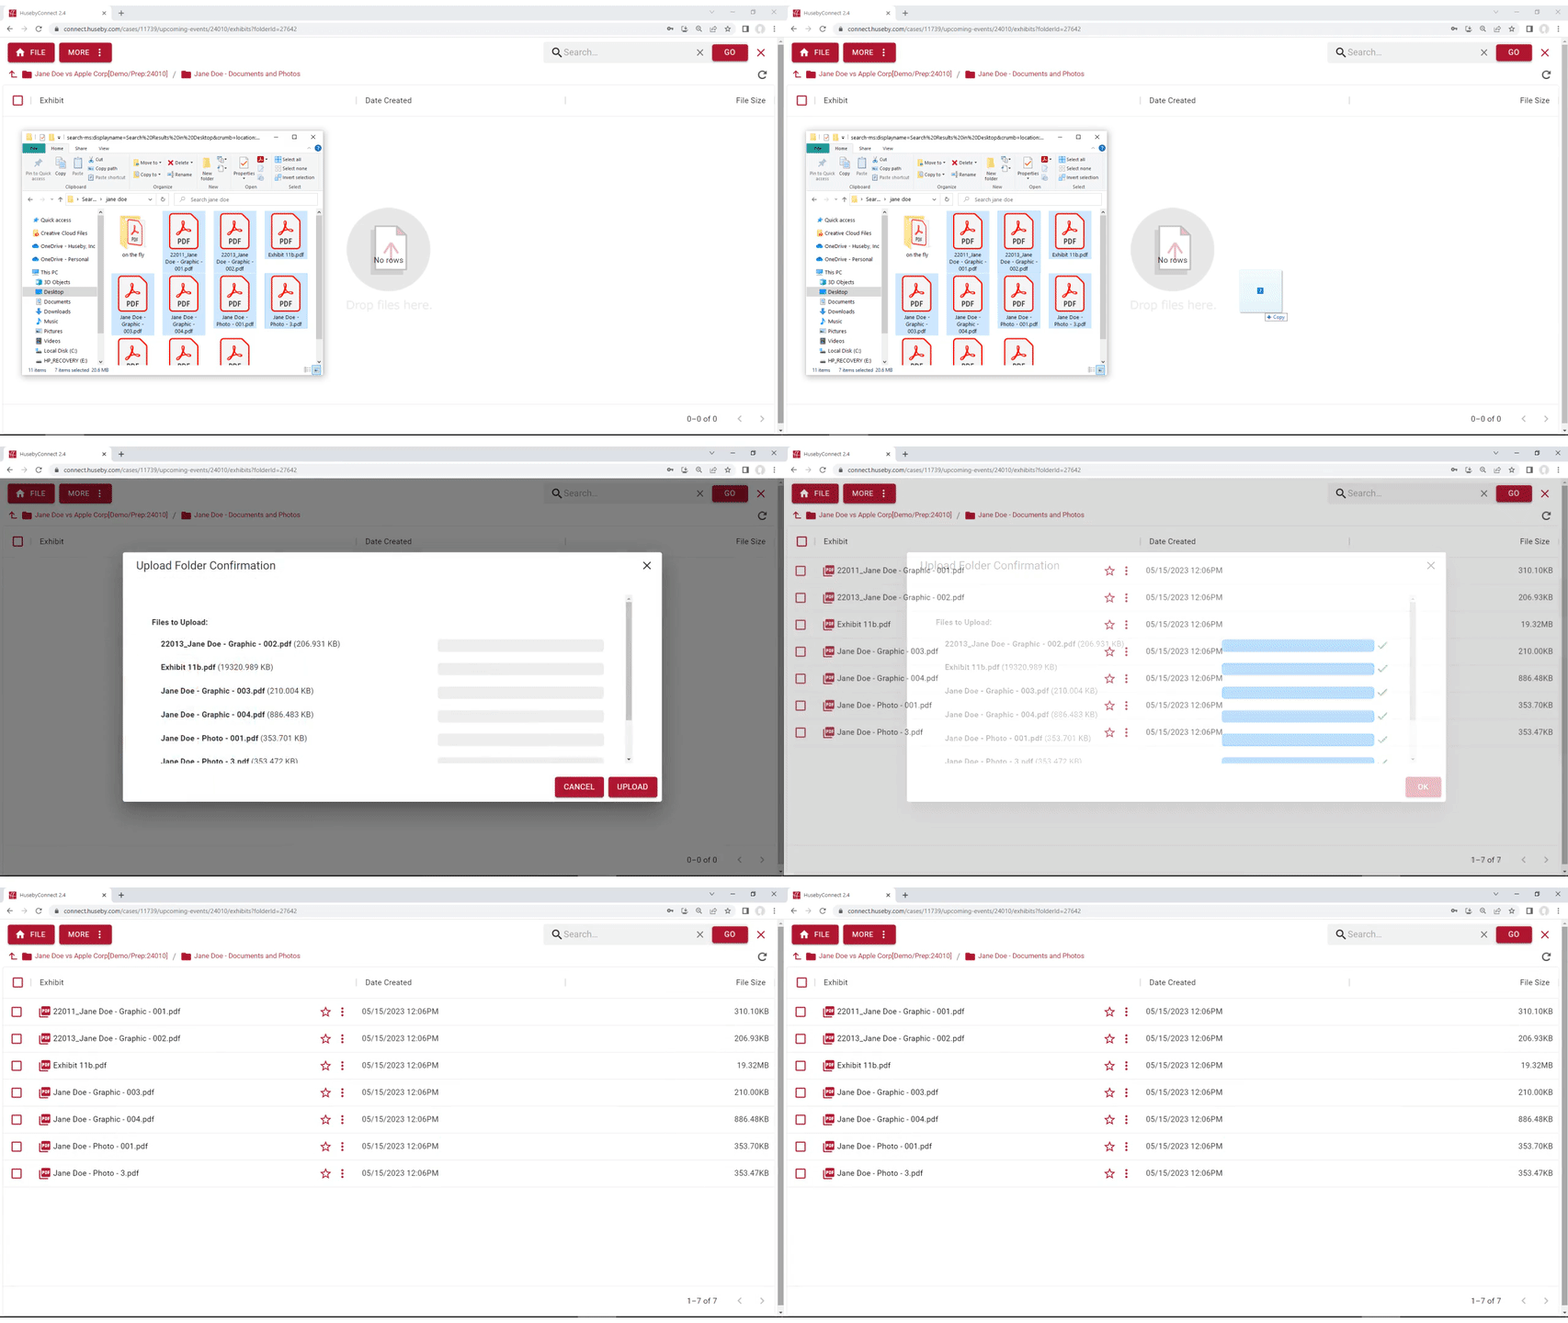
2. Drag and drop pre-populated folders or individual exhibit files.
- Click File/Upload
- Choose a folder or individuals files from your computer
- Drag-and-drop to upload

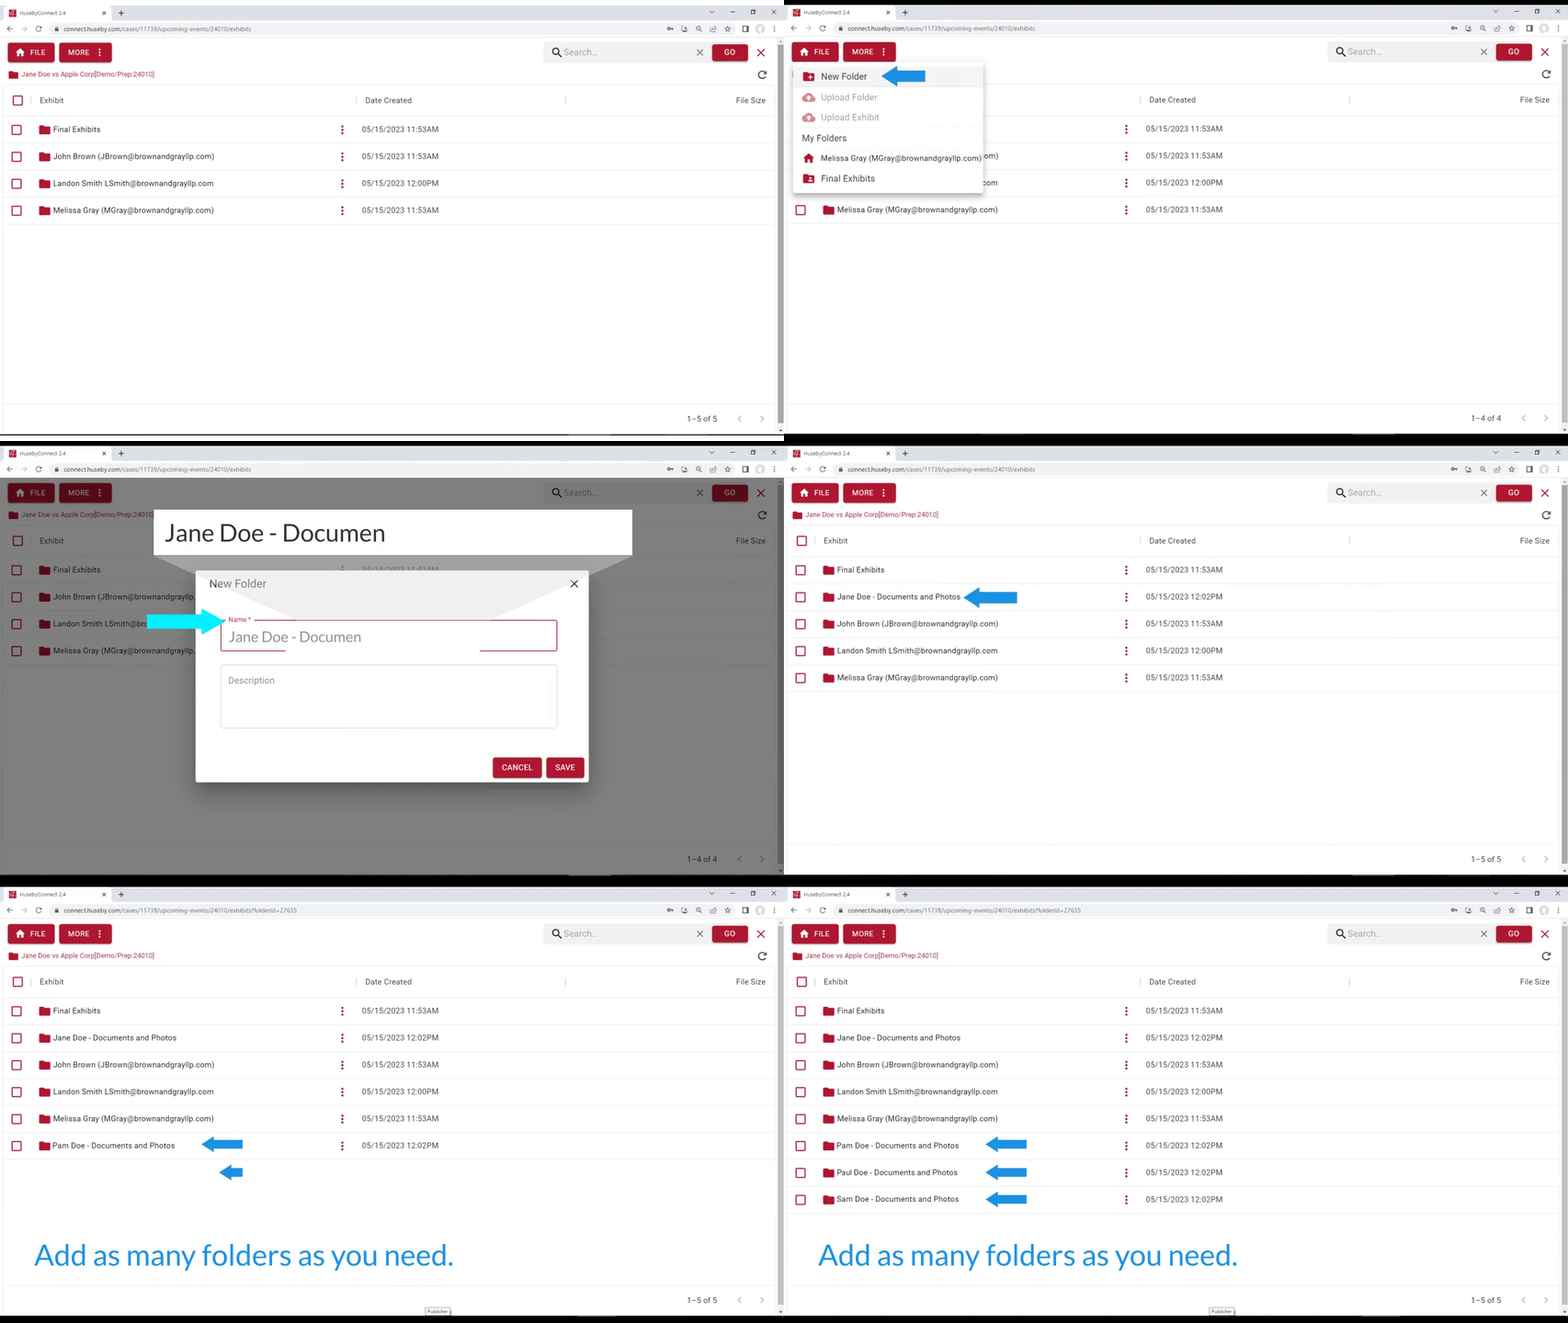
3. Create folders to further organize and move
your exhibits.
- Click File then New Folder
- Name the folder
- Add a Description if you wish
- Click Save

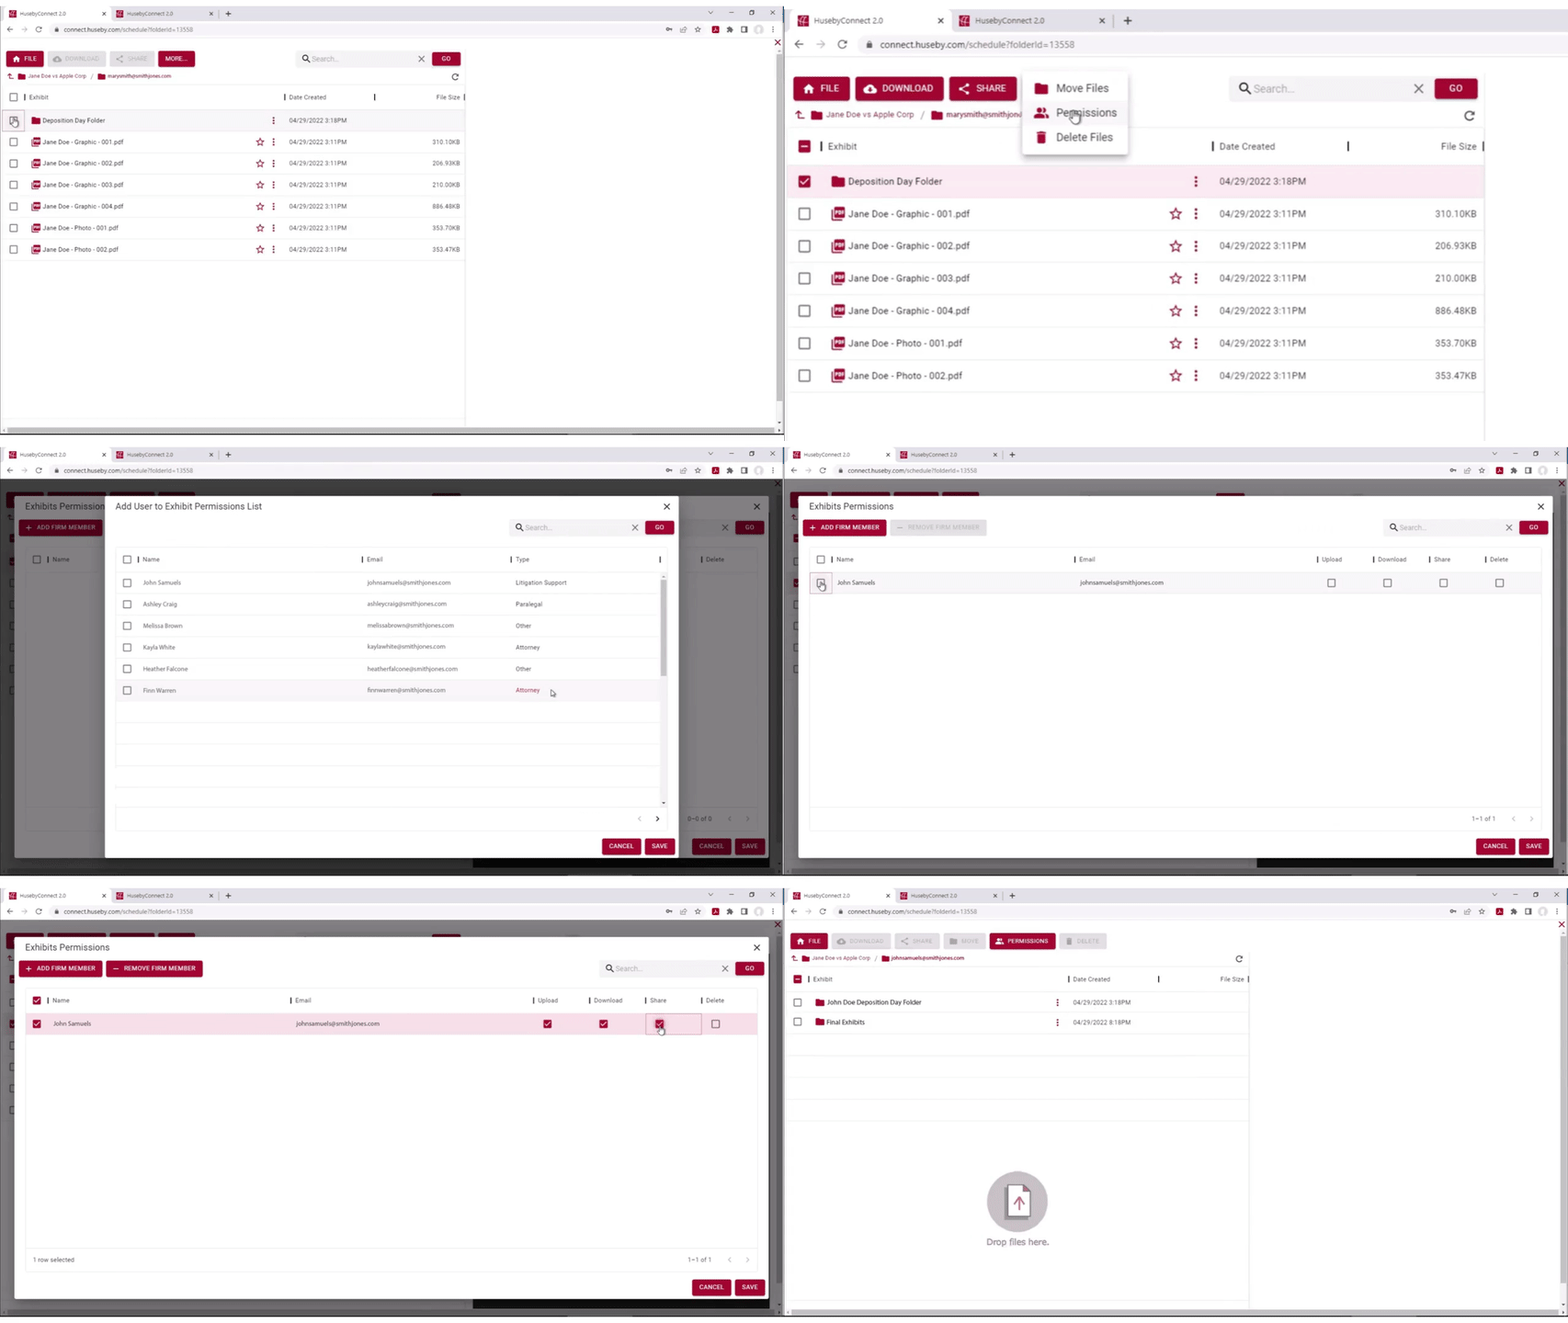
4. Give permissions to allow other team members to collaborate in your workspace.
- Choose a Folder or Individual Exhibits to assign permissions to for your team members
- Click Permissions
- Click + Firm Member
- Choose Firm Member(s)
- Assign Upload, Download, Share, and Delete Permissions to each

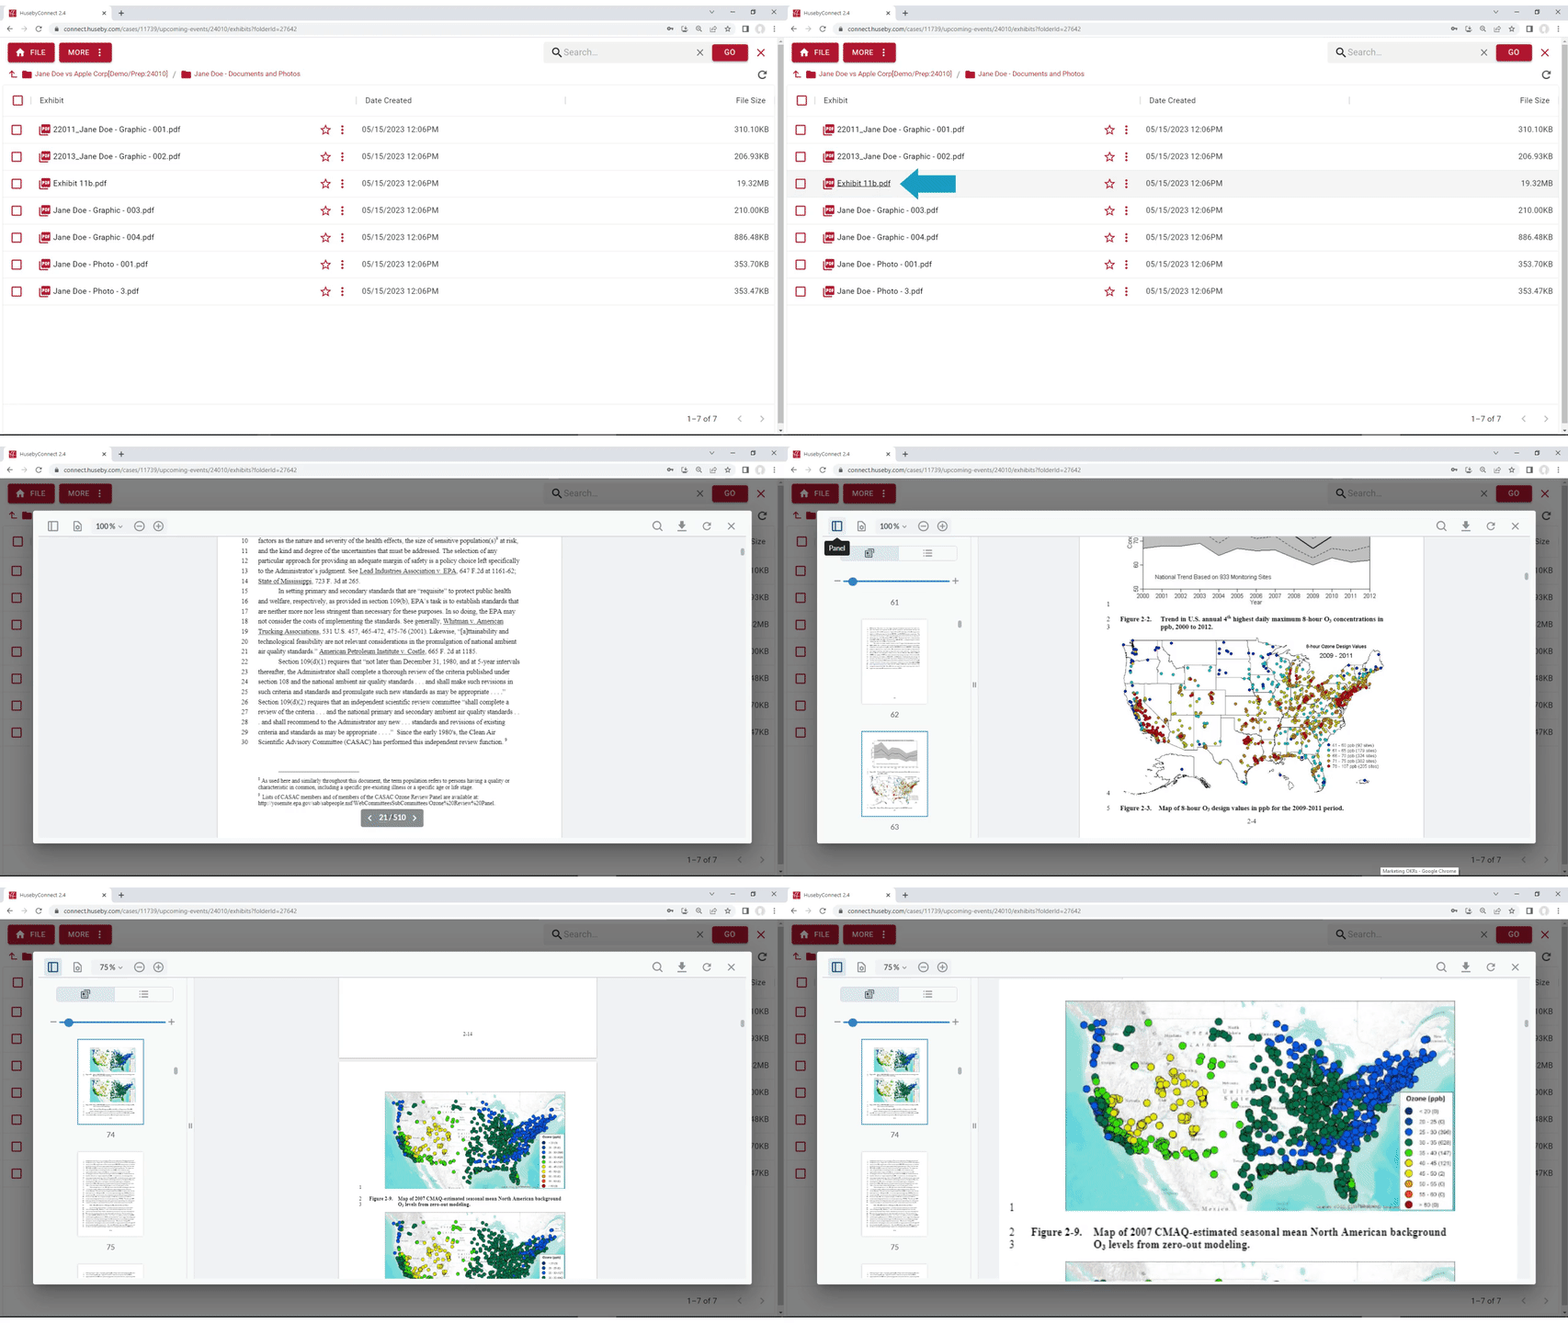
5. Click an exhibit to preview.
- Click the File Name of any exhbit
- A preview will pop-up
- Use Panel feature to see thumbnails and choose specific pages
- Zoom in or out, Refresh, even Download

...and Bonus!
Did
you forget to add an exhibit pre-deposition? HusebyConnect allows you to
drag and drop exhibits during your event to present on-the-fly!
CHECK OUT ANOTHER HusebyConnect Common Question Page: "Where's my link?"
Schedule a
HusebyConnect
Demo -->>

